
Connected accounts brings your business identities into one place: the numbers, social accounts and mailboxes that your team uses to communicate. Start here when adding a channel, checking why an account stopped working or confirming which actions a connection supports.
For example, a shop might receive Instagram enquiries, send order updates from WhatsApp and handle supplier email from a shared mailbox. Each identity needs its own connection and access checks before the team relies on it.
Prepare the right access
You need permission to view connected accounts, plus management access for the kind of account you want to change. Some connection setup pages also require communications settings access. Your workspace role and account assignment affect which connections appear. Being able to manage an email account does not automatically grant control over social accounts.
For a provider sign-in, have access to the business identity you intend to connect. For email, obtain the mailbox's SMTP and IMAP settings from its administrator, including the required authentication method. Provider permissions and your Momo Business role are separate requirements.
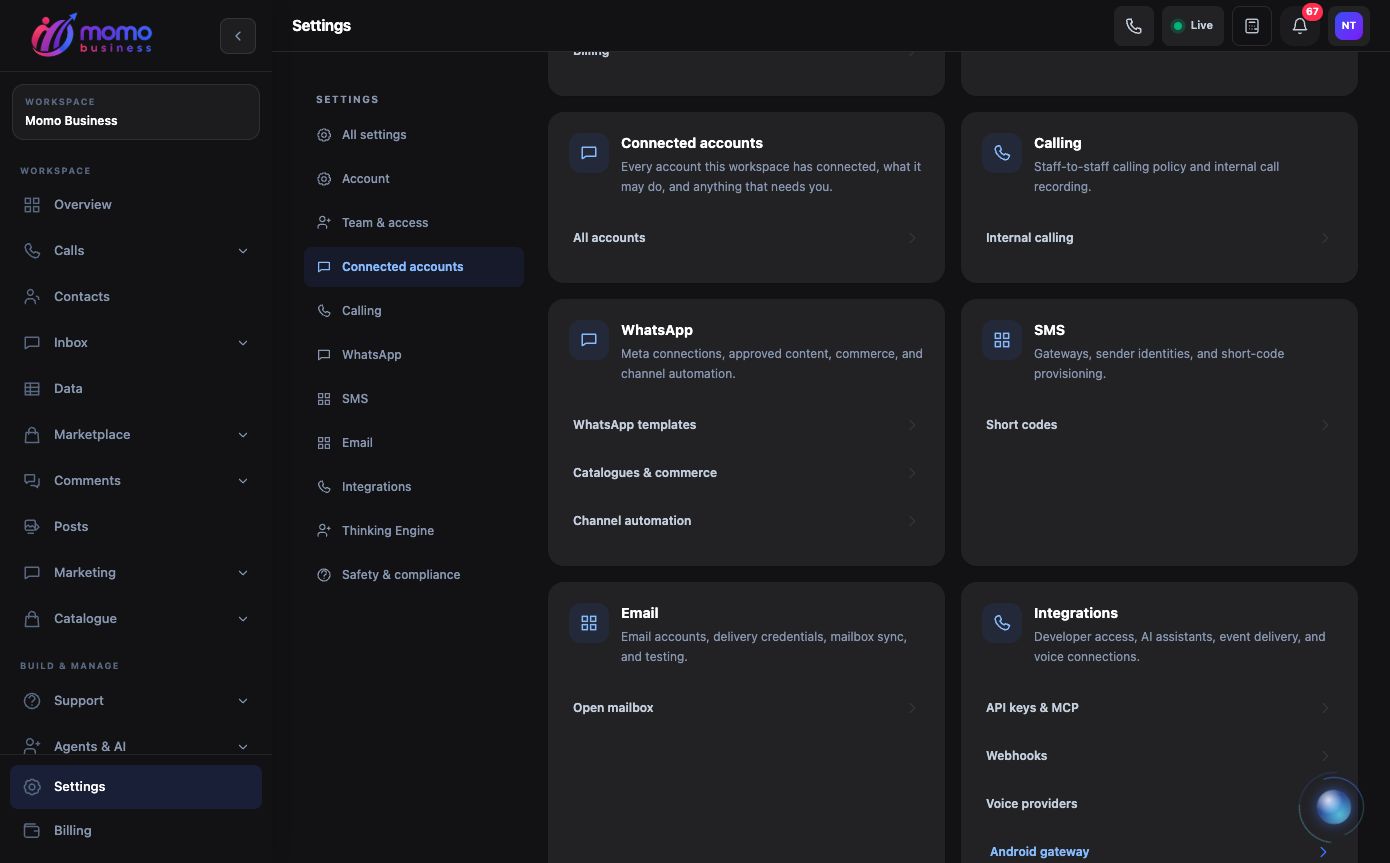
Use Settings → Connected accounts → All accounts to reach the account workspace. This screenshot shows the settings navigation. View full-size screenshot.
Connect and check an account
- Open Settings → Connected accounts → All accounts at Connected accounts. Review Overview, then use Accounts and search to check whether the identity is already connected.
- Select Connect an account. Choose an available entry and select Connect. The list explains when a platform is unavailable or your role cannot connect it. SMS identities are assigned separately and do not have a self-service connection entry here.
- Complete the selected provider's connection journey. Check the business, page, channel or number carefully before granting access. Return to Momo Business and select the resulting account to inspect its details.
- For Email mailbox, select + Add Account and complete Account, Outgoing (SMTP) and Incoming (IMAP). Enter the address, display name, server settings and credentials. Send Test sends a real test email to the entered recipient; use an address you control. Test IMAP checks the incoming connection. Select Save Account after reviewing the results.
- Open the account's Overview and available tabs. These differ by provider: a mailbox has Server and test and Folders and sync, while other accounts may offer Permissions, Templates or Publishing.
- Where Permissions is available, inspect each capability. Use Turn it on or Ask for it for an available provider grant. Request access for a capability marked not available yet records a request; it does not immediately enable the feature.
Connecting an account saves a usable business connection. It does not publish a social post or send a customer campaign. Check its actual capabilities before moving to the Inbox guide or Posts guide.
Keep connections working
Follow the account's displayed remedy. An expired provider login may need Reconnect; a mailbox password problem belongs under Server and test. When a health check is offered, allow it to finish and reload before assessing the result. A working incoming connection does not prove outgoing email works, or vice versa.
In Danger zone, supported accounts offer Pause and Switch back on without deleting the connection. Read the account-specific explanation before Disconnect: removal differs by provider, and disconnecting a mailbox can remove its stored local data. For a missing account, check assignment and role access; for a missing capability, check its provider grant and availability separately.
Choose the account's default responder
For a supported connection, open Automations in the account workspace. Choose Manual, an AI agent, or a Message flow, then complete the settings and select Save account automation. This is the normal starting point for deciding who handles that account's private messages.
An AI agent must have its engine and the appropriate inbox or email availability enabled. A flow must be published and compatible with the platform before it appears. Use Refresh choices after preparing an agent or flow in another tab.
Start AI replies with Draft for review and inspect the result from a test customer. Email automation prepares drafts only. Public comments have their own settings, even when they belong to the same social account.
A conversation can override the account choice. If one chat behaves differently, inspect its responder in Inbox before changing the whole account. Choose Use account default when that chat should follow the account again. The account and chat automation guide explains precedence and a practical test sequence.